- To begin, log in to the DNN site as an administrator.
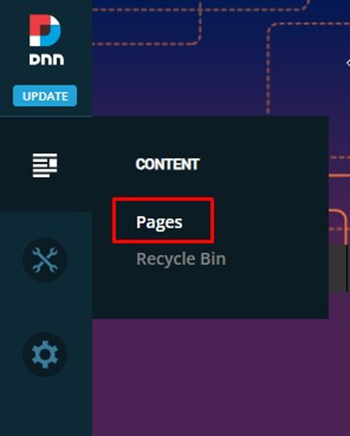
- In the left-hand admin bar hover over the Content icon and click Pages.
- In the page listing on the left, find the page you’d like to create a vanity/redirect URL for and click on it. For example, in the screenshot below we would like to add a vanity/redirect URL for the “2026 National Conference” page.

- In the page settings window on the right, click on the Advanced tab. Then click on the SEO sub-tab within the Advanced tab.

- Click on the “+ Add URL” button

- In the URL Path text box, enter in the vanity/redirect URL you’d like to create for the page. Typically, a vanity/redirect URL will be a shorter, easier to type, and easier to remember URL. In this case, we will be creating a vanity/redirect URL of “/2026Convention” for the page.

- In the URL type box change the URL type to “Redirect (301)”.
This is very important – if you leave the URL type as “Active” the live page URL will change. It is best practice to leave the Active URL as the full page path URL, such as https://www.aaohn.org/Events/2026-National-Conference and then have the vanity/redirect of https://www.aaohn.org/2026Convention point to/redirect users to the active page URL.
- Finally, click Save to complete the process. Users will now be able to go to your vanity/redirect URL and be taken to the specified page.
Notes
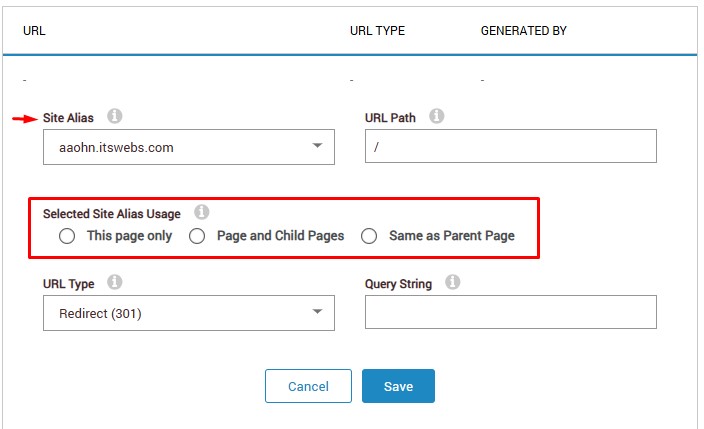
- This typically won’t be an issue, but if the below “Selected Site Alias Usage” popup appears when creating the vanity/redirect URL, the site alias selected is not correct. Select a different alias from the dropdown until the popup is gone.
Video Tutorial:
https://secure.itswebs.com/its/demos/DNN-Create-Vanity-Redirect-URL.mp4
Was this article helpful?
That’s Great!
Thank you for your feedback
Sorry! We couldn't be helpful
Thank you for your feedback
Feedback sent
We appreciate your effort and will try to fix the article